Mum’s Gujarati birthday was on Dhanteras, a day marking the celebration of increasing wealth and prosperity, and that also meant Diwali was only two days away.
So in honor of Mum, sharing her Mora Khaja recipe. every year, In her Diwali plate this was the raddest looking sweet thing ever!
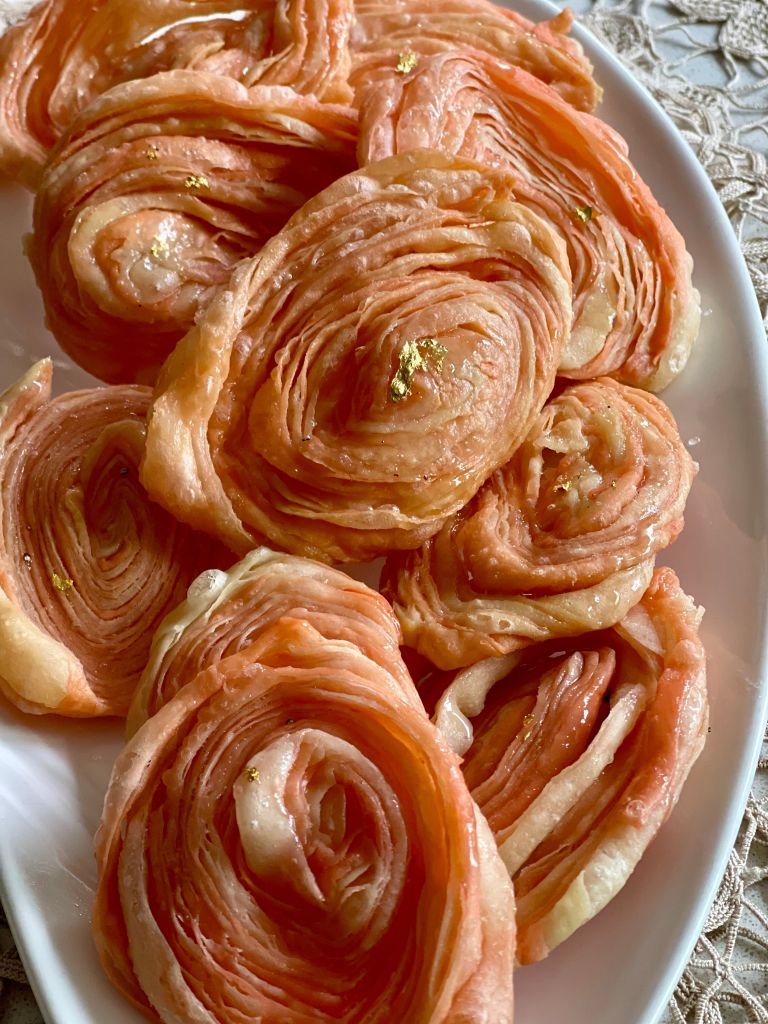
The only thing I do differently is instead of dipping them in the saffron syrup, I drizzle it over the khaja, and let it seep into every nook and cranny, so as you bite into the flaky pastry, you get that sweet sticky syrup.
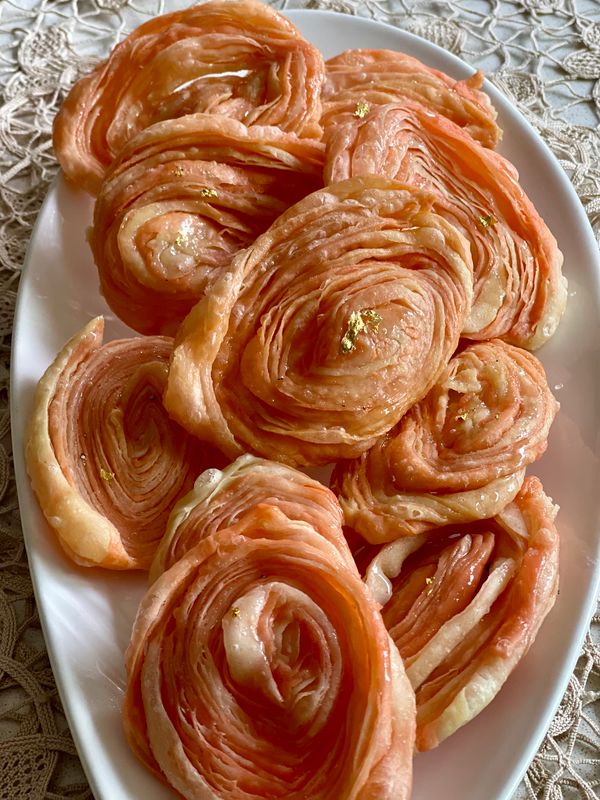
What is a khaja you ask? Think of it just like the delicate phyllo pastry in texture and appearance when fried, crisp, flaky spiraling layers melt in your mouth.
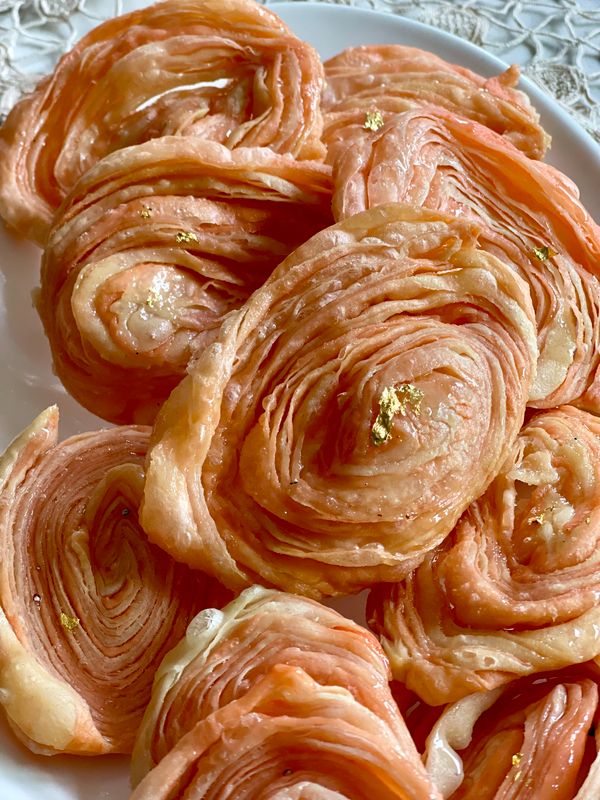
It is as rich as it looks, its distinct layers fanning out as it is fried with patience, then hand-dipped into a fragrant saffron-tinted sugar syrup.
Often you will see variations of these in shape and names, in South Africa, it is called the Banana Puri- because it resembles the unfurling banana leaf, in Odisha it is called the Puri Fheni Khaja and, Chirote in Maharashtra.
Khaja’s aren’t terribly difficult to make but they do require a bit of patience and practice, so take your time and half the recipe if you have to, enjoy what you create, and enjoy every last bite!
Ingredients:
- 4 cups plain flour
- 1/2 teaspoon baking powder
- 1/2 cup salted butter- melted
- 1/4 cup ice water*
Paste:
- 1/2 cup ghee
- 2 tablespoon Birds eye custard
- Oil for deep frying
Chasni
- 1 cup water
- 1 cup granulated sugar
- 1/2 fresh lemon juice
- 1/4 teaspoon ground cardamom powder
- Pinch of saffron pistils
- 1/2 teaspoon rose water (not essence!- optional)
Decorating
Pistachio flakes
Edible gold leaf
Instructions:
- Mix the flour, baking powder and butter and combine to form a dough, *use very little iced water if needed, depending on your brand of flour. You are looking for a firm but pliable but not hard.
- Let it rest for 20 minutes in a cool place or in the refrigerator on a hot day ( The world really is your oyster when it comes to colors for your multi layered khaja’s, if you are using two different colors, divide the dough into halves and color one half with some liquid food color slightly diluted with some ice water – try keeping a pale color with a slightly contrasting color you can have up to 3-4 different colors but keep them aesthetic.
- In the meantime make the syrup, heat the sugar and water in a saucepan together until it reaches 104°C/219°F on a candy thermometer and then remove from heat, add 1/2 tsp of lemon juice to stop the syrup from CRYSTALLIZING, then add the ground cardamom powder and saffron pistils.
- Prepare the paste by mixing the ghee and custard powder and set aside.
- Divide dough into 20 pieces (or 10 of each color). Roll each one into a medium thin circle you are looking for a thin roti thinness.
- Brush each with the ghee & custard powder paste.
- Place one circle on the other, repeating so you end up with 10 circles (10 sets of 2 stuck circles) {so 20 into 10, 10 into 5, and 5 into 4 with 2 extra}
- Set aside 2 circles, and again brush each remaining circle with the paste, and stack them up to get 4 stacks, then paste the circles again and join to make 2 stacks of pasted circles, with 2 set aside.
- Now place each stacked circle on one of the circles you had set aside, press slightly to get all the layers to adjust and stick, then roll one circle out into a really large circle, it should have a thin tissue like appearance, and look really fragile, but that is ok!
- Roll the circle upwards into a Swiss roll, and cut into 1/2 cm circles, slice sideways to get oblong shapes.
- repeat with the second circle. The amount of discs/khajas you get depends on the largeness of your circle and the length of the Swiss roll.
- Take each circle with layers facing upwards, flatten each one slightly with your finger and then with a very gentle pressure roll pin to get an elongated shape about 5-6cm’s tall.
- Heat the oil in a flat pan on medium-low heat, then reduce to low heat. Dip the handle of a wooden skewer in the oil and if bubbles form, the oil is ready.
- Fry 2 khaja’s at a time, after 1 minute in the oil, gently tap on the khaja to open up the layers then flip and fry the other side, and similarly, gently tap with a chopstick or a spoon to open up layers.
- Fry for at least 3 minutes on low heat, so the inside layers cook, and the top turns a light gold, that’s why I recommend frying only 2-3 at a time*
Air fry Method:
*Air Fry the khajas at 370 degrees, for 20 minutes checking in between, but timing may vary based on air fryer.
Allow to cool on a cooling rack and stack them in a line standing up so they drain off any excess oil.
Once cool, drizzle with the syrup using a tablespoon, and decorate with nuts and edible gold leaf.
Or store in an airtight container for up to 3 weeks, and just before serving drizzle with the syrup
Watch me make it here:
Did you like or try this recipe? If so, I would love to hear from you. You can tag and follow me on Instagram @spicymemsahib


Leave a comment